Tuesday, December 28, 2010

Battery D is dead, probably.

I gained access to a decent battery charger last night and let the battery.  I let it charge at 10A and when I checked on it a few hours later, it dislayed F01.  I looked this up and it means "F01 Internal Shorted Cell Battery - Cannot be charged. Have battery checked by certified auto service center."  

So this week, I'm going to drop that battery off at the vendor and see if they can get it working.  Apparently, this is one of the first two batteries I got in Oct of 2009.  It's been going bad all summer, so hopefully I can get them to replace it if need be. 

On another note, I finally finished up the leftover tank of propanee from last year.  Yesterday and today I've been running the propane heater quite a bit.  Yesterday I ran it for over an hour during the day, and this morning I let it run for 30 minutes as it warmed the van from 25F to 50F.  So a new canister is in and I have 3 remaining.

Monday, December 27, 2010

Battery Saga continues

In my previous post, I commented on battery C dragging down the system. Since then, I recharged battery C and put it back into the array. For the first day or two, things were fine. However, when I returned the next week, the entire array was again reading 19V. I ran the battery equalizer function on the charge controller and this failed to resolve the issue.


I didn't do anything else with it right away, and then I went on vacation. Today however, I went ahead and investigated the batteries again. A&B had 12V while C&D had 7V. As a test, I decided to rotate the batteries, moving battery C to A's spot and battery A to C's spot. B & C paired together nicely, but when I went to pair A & D together, I got sparkage. A little sparkage isn't an issue, so I held the wire on. The contact area maintained an electric glow and after a few seconds, battery D began bubbling.

Now, I then tested each battery individually and found D holding at 7V while C had 11V. I also checked the specific gravity and D shows as being "fair" with some wells being "good". I don't like the sound of bubbling battery acid in my van, so I am going to take D home and charge it with the trickle charger. Alternatively, I might just take it to the store I got it from and ask them to check it out.

In the mean time, I connected two of my good batteries in series. At least this way, I have enough power to run the inverter because it will shut off if the voltage dips below 19V and 19V is about the maximum I can get out my system with the bad battery in.

Tuesday, November 30, 2010

Wiring Diagram


Above is the current wiring diagram I have in the van.  I recently had issues where battery C died, dragging down the system.  I used a battery checker - a little clear plastic device with a floater in it.  Battery C showed as weak while battery D showed as good (despite only measuring 7 volts when isolated from the system).  So battery C appears to have died and dragged down battery D's charge with it.  I took battery C home, replaced the fluid with fresh distilled water, and it charged up properly to 12V.  Hopefully that means the battery is now good.

Part of me wonders though, could my wiring be to blame.  Perhaps the right side is not charging like the left side and caused battery C to fail.

Thursday, November 18, 2010

More battery findings

So today had more sun and the meter was reading around 25V. I dug around and was able to pull the "quick disconnect" apart. They don't always want to disconnect, and certainly not quickly. The disconnect was the positive lead between the charge controller and the battery bank.

Immediately, the meter dropped to 22.58, which just verified that they had been getting power from the panel. I then left and came back 3 hours later. The voltage had dropped to ~20V. This confirms that at least one of the batteries is bad.

So next week, I'll bring down my battery tester (the one that measures specific gravity) and hopefully a nice funnel or water bulb (like you sue for ears) to refill the water in them.

If a battery is fully bad, they should have a multi-year warranty that I need to check out.

Tuesday, November 16, 2010

Gotta go, my battery is low.

So I've been noticing for a long time that my batteries seem to drain down at night. This was a minor annoyance previously, but now that there are only around 10 hours of sunlight in the day (sunrise ~7AM / sunset ~5PM), it has become a real issue as the batteries are now hovering around 20V and barely get above 22 after a full day's charge.

Now, the charge controller is supposed to have a night disconnect that prevents nighttime discharging through the solar panel. I had assumed that this was controlled by one of the potentiometers on the inside. So last week, I broke out the manual and went over all the details and found that they really only control how high it takes the voltage before it stops charging. They do not impact the low voltage disconnect. I did make a few adjustments to have it try to give more charge to the batteries. This seemed to have no affect.

So I emailed the Xantrex support people. They gave me a few troubleshooting tips, one of which is to determine if the batteries themselves are holding a charge. To test this, I would charge the batteries to full capacity (which at this point may involve taking them home), disconnecting the load and charge controller, and see if the voltage drops over a 12 hour period. If I had one, I could also try a DC clamp on ammeter to see if current is flowing to the solar panels.

I currently have no easy way to disconnect the solar panels. I have ordered two DC circuit breakers - 1 50A one for between the solar panels and the charge controller and one 100A for between the batteries and the load. Each breaker is around $25 so I will be adding $50 once I set these up.

Wednesday, November 3, 2010

Weather and Life

Traveling

Last week, I took my van back home to get it's yearly inspection.  Unfortunately, the garage itself was out of stickers.  They could have scheduled me again for Monday, but I of course had to work Monday.  So we have one scheduled for Thursday, which means I'll be taking the van up a second time.

Remodeling

While I did have the van at home, I took the time to do some remodeling again. I cut the bed to be shorter (my length), made the desk a bit shorter (lengthwise, not height wise), and secured the sink to the side of the desk.  All in all, this gives me much more room to move about inside the van.

I also have brought down a microwave to heat soup up with.  I am not sure how well it works.  Transporting it the first time, it fell over, hit some junk I was transporting and dented.  I put my soup in on Monday to heat it up.  It ran, but made a whiny noise.  The soup came out tepid instead of hot, like I would hope.  I'll try it again next week (I only had the one can) for a longer period.

Weather

Things have been a bit chilly this week, with freezing/frost conditions in the morning.  I was supposed to bring my heater down with the van, but left it at home.  Despite this freezing weather, my sleeping bag still remains a viable source of protection from the elements.  Also, the temperature does warm up inside the van into the high 60s by mid-day.  On Monday, i even had to open a window and roof vent to let the cooler outdoor air in.


Monday, September 6, 2010

Oops and soup


Things are starting to cool down, but I still find myself needing ac for a portion of the day. Today around 11, I fired up the generator and the ac.  Then, around 3:30, I was up and noticed my inverter was only reading 20 volts. Turns out I had been running off of the inverter all day. That would be fine, except I was also running the generator with no load.

At work, I have been primarily eating soup, while eating fast food during the day. So this week I purchased a thermos.  It seems to work pretty good. The soup I made at 6am is still hot and it has its own cup to pour the soup into.  My plan is to take the thermos back into work each day for cleaning and refill.

Tuesday, August 17, 2010

One Year Anniversary: One year of camping.

As of August 17th, I have weathered summer, fall, winter, spring, and summer again in the van. It wasn't always easy, but it wasn't that bad either. Over time I have improved the interior of the van to the point where I now have reliable power, a bed, a desk, a chair, and storage. In short, it has become an adequate mobile apartment (minus a shower/sink). From the world's perspective -- I am roughing it in a van. From my perspective, I have a comfortable place to sleep.

One thing that has really helped is the presence of a local library. I can go to the air conditioned library with my laptop, get online, and stay there for as long as I like. I recently been utilizing the library to study for an Oracle certification. In fact, the library is tied in with Safari Bookshelf, so I have access to large number of study materials beyond what the library has.

Money-wise, I have continued to keep up with tracking my expenses. This spring, I had some major expenditures in solar panels, batteries, charge controllers, and wiring of the same. The end result of this is a 24V solar-charged battery system that provides 12/24V DC and 120V AC power to anything I need. I spent around $1700 on this system, so that brought my equipment costs to $4,698, or $391.50/month. My operating costs include things like generator fuel, propane, inspection, insurance, and gym membership. The total in operating costs for the year was $581, or $48.44/month. The combined total was $5,279, or $439.40/month.

For comparison, a cheap 1-bedroom apartment (in a shared house) in this area is $500/month and utilities would easily add $100 on top of that. So over the course of a year, I would have spent $7600 on such an apartment. This means that over the course of 1 year, I saved $2,321 in rent/utilities by camping at work.  What makes this more exciting is that the bulk of my cost was purchasing equipment.  Barring any issues with my equipment and assuming $50/month operating cost, my second year will only cost me $600.

Where I Went Wrong

Looking back, there are a few things I would have liked to do differently. 

  1. The mattress.  I started off with the van's mattress, which was an ok way to get started, but then I went to an air mattress.  If I had done my research, I would have learned that air mattresses and cold weather don't mix.  I replaced it with a foam mattress from Ikea, but I would have been $50 richer going with the foam mattress from the start.
  2. Solar panels.  I should have gone a full summer of measuring my air conditioner's load before building my battery/solar panel array.  I was basing it off of my usage from the end of August.  Also, I didn't get a chance to measure wattage pull until winter.  To do this, I cranked up the furnace at home and then turned on the air conditioner.  I came up with a pull of 500-600 Watts.  However, during this hot summer, I really pull 1000-1200W, about double what I built for.  In order to handle that, I will need 2-3 times the batteries I currently have, plus the copper wiring to tie it all together.  Once I increase my batteries to handle the load, I would then need to add another solar panel to recharge the system in time for each week.  If I had waited and got a full summer's worth of readings from the watt meter, I could have purchased and built with more confidence.  On the other hand, researching setting up the system was a desired learning experience that I suspect will prove useful in the future.
  3. Generator choice.  Granted, I probably couldn't have known this, but the generator I got often requires moving the choke in order to start it.  So while I was able to rig up a remote start, most of the time I still had to go to the generator and operate the choke.  I may be able to work around this using a cable and spring setup, but I suspect the result will be flaky.  Some of the more expensive generators from Honda come with remote starts (and are quieter).  The downside is that they usually only hold 2 gallons of gas.
 Camping at work has been a dual-purpose endeavor.  On one side, it has a very practical application of saving me money.  The other purpose is that of learning.  When you go "off-grid" you no longer can rely on cookie-cutter solutions.  You have to come up with your own solutions for each issue and experiment until you find what works. 

Wednesday, June 16, 2010

84 sq foot house

During half the week, I live in a 60ft square foot home, but I don't cook and shower inside it. This lady has essentially built a house on a trailer and has 84 square feet.  I like it.

   http://www.ebaumsworld.com/video/watch/81014570/

Tuesday, May 25, 2010

Low Voltage Beep

I ran the air conditioner for a short while yesterday, along with most of today.  Around 3:30pm, I got a low voltage warning from the inverter.  The voltage reading on the inverter was at 20V (vs 25V where it starts at).

For 5/24, I ran the air conditioner for 46minutes and pulled 0.41Kwh.  For today, I ran it 5hrs, 40 minutes and pulled 1.74Kwh before I got the beep.  That totals to 6hrs, 26minutes of run time and 2.15KWhrs.  In my last post, I had estimated my battery bank of being capable of 8.4Kwhrs (Each battery being a 2.1KWhr battery, times 4 batteries).  So I seem to be getting about the run time of one battery instead of 4 (or even 2).  

Now, to be 100% fair.. once I turned off the air conditioner, I continued to run the fan for another 1.5 hours.  Granted, the power usage of the fan is less than the output of the solar panel, so it could potentially run indefinitely.

Given the current setup, I definitely will not be able to use the air conditioner for 3 days on one charge.  At this point, I'm not exactly sure why I'm only getting 25% of my capacity out of the  system.  Perhaps I need to redo the wiring inside the battery box to more evenly draw across all 4 batteries.

As a stopgag, I can try a few other options.  The easiest would be to bring the generator back down and only run it once the batteries have ran out.  I also have a 24V charger, so I could be charging the batteries off the generator at the same time.  I could also upgrade my battery array to 6 or 8 batteries.

Another option I've been considering is one of the evaporative/swamp coolers.  Generally, these are a fan that blows over water.  They work on two concepts: 1) water has thermal mass and stays cooler longer, and 2) small drops of water will cool you down and then evaporate away.  They have a few downsides: 1) they don't actually cool the air, just make you feel cooler, and 2) they increase the humidity.  If you let them run long enough in an enclosed space, the humidity increases and the cooling effect stops.  Also, if the humidity is too high, sweat stops evaporating and you warm up either further.  Another disadvantage is that you have to refill the water from time to time.

Back to the drawing board..

Monday, May 3, 2010

Electrical setup details.

Today I thought I'd take some time and explain my electronics setup in greater detail.  A lot of this system is all about crunching numbers.  The math isn't complicated - it's all multiplication and division, elementary school type word problems.

A friend of mine likes to claim that I should be able to calculate all of this out before purchasing the first battery.  And you sort of can.  You can determine how big your system will be and how long it will operate under different loads.  But what he doesn't seem to get is that you can't always determine your load.  The bulk of my setup is in place in order to operate an air conditioner.  How much I use this air conditioner and how hard the air conditioner works changes like the weather. The compressor kicks on and off as needed and this is a variable you can only learn by testing over a period of time.  Manufacturers may have this data, but rarely is it published.  Plus, a number of variables such as humidity and thermal change make this data unreliable.  More on this later.

First, we have the battery pack.  These are 4x 12V deep-cycle batteries with a reserve capacity of 175Amp-hours each.  What is an amp-hour?  Simply put, it measures the amount of Amps a battery can produce for 1 hour before it is discharged.  So a 175Ah 12V battery can (theoretically) produce 175 Amps for 1 hour before becoming depleted.  For our purposes, we really wan the "watt-hours" of the battery.  This of course is how many Watts of power a battery can produce for one hour.  To caclulate power, we multiply Amperage times Voltage: 175A * 12V = 2100Wh (or 2.1KWh).   So each battery can run a 2000 Watt appliance for 1 hour, or a 1000 Watt appliance for 2 hours. 

 We have 4 of these batteries, divided into 2 sets of 2.  Within each set, the batteries are connected in parallel using #2 AWG wire, which increases the amperage capability from 175Ah to 350Ah, but not the voltage.  The power rating for 350Ah set is 4.2Kw.   The two sets are then connected in series, which leaves the amperage the same, but increases the voltage to 24V.  So we now have a 350Ah system at 24V, or more importantly an 8.4KWh battery system.

At this point, you may be wondering why I am going from 12V to 24V.  If all 4 were hooked up in parallel, I would still have gotten an 8.4KWh system.  The reason has to do with wiring and efficiency.  DC voltage can drop quite easily over short distances.  So if you're going to work with DC voltages, you want to get your voltage up as high as possible before transmitting it.  In practice, most people have to choose between 12V, 24V, and 48V systems.  You usually only see 48V in grid-tie systems and industrial applications.

Connected to this battery pack, I have 3 devices:
  1. A 24V 1500W A/C Inverter  - this will convert my 24 volt DC electricity into 120V house current and can power 1500W devices (with a peak of 3000W).  This is connected via #4 AWG wire.
  2. A 12 volt converter.  This little box regulates the 24V voltage down to 12 volts, which is quite useful since a large number of devices are designed to operate at 12 volts.  The box claims to be rated at 30A, but I have it fused at 25A.
  3. A Xantrex C35 - 24-volt DC charge controller.  This charge controller is capable of 35A @ 24V or 840W.  This is then connected to the solar panel.  Due to the higher voltage/lower wattage, this is connected with #10 AWG wire -- technically called MC4 Interconnect wire, which is standard on most solar panels these days.
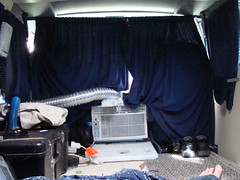
The Inverter powers my air conditioner.  I also have another power strip connected to it that I use on occasion for small devices, such as the fan or my netbook.

The solar panel is an HQRP  24V, 180W solar panel  (7.5A).  Most guides on designing solar systems recommend that you get a solar panel array capable of producing 30% of your system's capacity.  This guideline is for a daily use system. When the guides discuss this, they typically refer to your battery bank's capacity (and the battery capacity should always be 2-3 times your load). Apparently 30% has been determined as the optimal amount for recharging batteries.  If you recharge with too much power, you could damage the batteries.  If you recharge too slowly, you could end up never recharging the batteries.

My solor panel is way below this recommendation.  At the 8.4KWh rating, the 180W panel is around 2% capacity.  If I built my array out to the full 840W that the charge controller can handle, I would still only be at 10% capacity.  However, I do not use this system on a daily basis.  During last August's super hot weeks, I ran the air conditioner 4-5 hours each day.  So on a peak long week, I will use the air conditioner for 3 x 5-hour stretches, for a total of 15hours each week.

My current air conditioner peaks around 1000W while the compressor is running.  The compressor will run for 1-2 minutes, and then run the fan for 4-6 minutes. During the one measurement I recorded (1hr, 20 minutes), the air conditioner averaged 0.31KW/hour.  A 15-hour week should pull 4.62KW, or just over half of my battery bank's capacity.   I do want to take more measurements of this load to get better figures.  This air conditioner is a 5200 BTU with an EER of 11 - see it on my equipment page.

To be fair, the inverter and wiring do loose some power, just as any system does.  Also, I will from time to time run some 12V appliances off of the system.  All of these impact my calculation.  Also, during the morning and evenings when I am not utilizing my air conditioner, the solar panel is hard at work recharging the system.  I have only run the air conditioner on a few occasions, and only 2 days in a row so far (cooler weather outside).  But on day 2, the battery pack is recharged before I start the air conditioner.  On day three, the battery pack is recharged again even though I haven't started the air conditioner.


I don't know if that will remain true when the weather heats up and the air conditioner has to work harder.   At 8.4KWh, the battery pack can sustain around 0.5KW/hour for 15 hours, then it would need completely recharged. If hotter weather begins taking me beyond 0.5KW/hour, my best solution is to increase the size of the battery bank to match.  If I increase the size of the battery bank and find that the batteries are not getting recharged in suitable time, I will have to increase the size of the solar array to shorten the recharge time.  Neither is exactly cheap.  The batteries run around $85, plus the expensive wiring (call it $100/battery).  I also need to find room for the batteries (somewhere where I can tie them into the existing set).  The solar panel itself can run $500-$600, but can be easily mounted on the roof with the other one.


The 12V converter was purchased on ebay for around $30 and comes from Hong Kong. It is rated at 30A, but I have it fused at 25A (the fuse goes between the converter and the 24V battery pack) for added safety.  The converter has two accessory wires which I have no use for (but come in handy for a radio setup).  The 12V output goes into a fuse block.  I paid way too much for this on ebay for $48 shipped.  If you are smart, you'll go with my original idea and pull one off a junkyard car for much less, perhaps free.  This fuse block has two independent positive buses, a negative bus, and 14 fuse slots.  I could technically run separate 12V and 24V devices off of this, but I have no 24V devices, so the two positive buses are linked together.

Currently, I have 3 x 5A circuits coming off of the fuse bus.  One goes to the fan vent in the ceiling.  Another goes to a set of lights over the desk (which I pulled out of the van originally).  The final one goes to a 3-port power socket (cigarette lighter socket).  This lets me plug in common 12V car accessories such as cell phone chargers.

Monday, April 12, 2010

Air Conditioning!!


Living Room
Originally uploaded by Camp At Work
Today topsy-turveyed some of my notes from last week. The high we were calling for today was 70. My outdoor probe recorded 75F, which should have been fine. However, inside reached 85 around 12:30. The thermometer on top of the black battery box read 89.

I got up around 1 and began the air conditoner install. The rubber grommet I had didn't work for attaching the hose, so I will have to shop around for one. What I did in the meantime was to prop the air conditioner up on a metal basket I have and place a water bottle underneat the drain plug. After an hour, I have yet to see any water form to drip down, so I don't know how often I would have to empty it, if at all.

At this point, the air conditioner has been running for slightly over an hour and performed 4 cycles of running the compressor. The last cycle was one I forced by turning the temp from 76 down to 60. The compressor runs for a 1-3 minutes than shuts off, after which the fan runs. The first cycle took the wattage up to 500. However the second and third cycles slowly worked their way up to 1000W before the compressor turned off. The fourth cycle went up to 750W before shutting off. Checking my watt-meter, it ran for 1hr 21m and pulled .41Kw.

The duct hose will need some insulation wrapped around it. I moved my temp probe to the duct and when the compressor runs, the hose reachs around 120F. Additionally, the glue on my foil tape seems to break down. Parts of the tape that I would press snugly against the aluminum would peel back later. The first time I noticed this, it was letting the hot air out directly into the cab of the van. I thought this was supposed to be a high-heat tape. I guess 120F is too high of heat for something made to go over furnace ducts.

Wednesday, April 7, 2010

Van Upgrades and Spring Heat

As you saw in the last post, I have been doing a lot of work on the van.

  • Pulled out all the seats in the back
  • Placed insulation on the floors and walls
  • Put down a wooden floor
  • Added a roof vent with a built in 12V exhaust fan.  
  • Added 4x 175Ah deep-cycle batteries in 24V array (2 parallel banks in a series circuit)
  • Added a 180W 24V solar panel
  • Added a Xantrec C35 24V charge controller
  • Added a 24V 1500W inverter
  • Added a 24V to 12V converter
  • I have replaced the air mattress with a foam mattress
All this expensive stuff is going to seriously reset my equipment cost breakdown.  I hope to be updating that soon once I tabulate all my receipts.  All in all, I expect I easily crossed a $2000 mark.

Now, with all these improvements, I plan on being able to be "generator free" this summer.  I have also purchased a Frigidaire 5200 BTU AC that will consume < 500W when running.  It also has an energy saver mode that will kick off the compressor and operate a fan.  I am very excited to see how everything works together.

The downside: This week, I did not have either air conditioner in the van.  Temperatures Mon-Wed peaked in the 90Fs, and according my thermometer and others, reached 100F over the parking lot.

The upside: The insulation and exhaust are definitely doing their trick.  Previously the van would heat up approximately 20F more than the outside.  If it was 60-70 outside, I would get 80-90 inside.  It was a tin oven.  For this week, it was hot but understandably so.  Monday: temperatures outside showed reaching 97F on my thermometer.  Inside the van peaked around 92F.   On Tuesday, the situation worsened.  At the peak (around 1-2PM), the temperature outside reached 100F while inside went to 102F.  Unbearable even with the fans blowing all the air around.  Today however, was somewhat nicer.  The temp still made it up to 98F outside, but inside stayed about the same or a 1-3 degrees less.  It was hot, but the humidity went down to 26%.  Normally, it is 35% inside the van.  The lower humidity made it bearable, even comfortable inside.

Another downside of running fans is that you have to be careful how you sleep.  If your mouth is slightly open, it will dry out from all the air rushing around.

Now that the major work is done, I will be able to leave the van stationary again, prolonging the vehicle's life and reducing my gas expenses.  Currently, it sits around 127k miles, which isn't much for a '93, especially with the truck engine inside it.

Remodeling photos on Flickr

Over the last couple weeks, we have done some serious remodeling to the mobile apartment.  The van seats have been ripped out, insulation has been added, new flooring is in place, and a nice paint job has taken place.  Additionally, a solar panel and battery box combo have been installed.

Check out the remodel on Flickr.

Thursday, March 4, 2010

Inverter and Air Conditioner Test

UPDATE:

The confusion below regarding AH and run time has beencleared up.

A 175Ah battery provides 175A @ 12V (2100W) for 1 hour. 

The portable 9000 BTU air conditioner actually pulls 9-10A @ 115V (900-1000W) (giving it an EER or 9).   However, my inverter is rated at 1500W with a peak of 3000.  I believe at the moment the compressor kicks on, it pulls around 2000W and exceeds the batteries capabilities, coupled with losses from the inverter.  It would be an interesting idea to take a fully charged starting battery with a high CCA rating to see if it could activate the compressor for a few minutes.


I have ordered a 5100BTU air conditioner with an 11.7 EER value.  This should pull 435W when the compressor is running.  It is a window unit, so I'll have to make a special box/duct for it.

Fun Fact: Take an air conditioner's BTU and divide it by its EER to get the electrical power usage (watts).


=======================
Today (at home) I did a somewhat expensive test.  I connected to 175Ah deep-cycle batteries in series to a 24v / 1500W power inverter.  I then used this to power my air conditioner.

A few things first.  It's 30F outside, so this test would not work in my van.  I discovered it wouldn't even work in the basement of my house (too cool).  I left it running for 4 hours in my basement connected to the battery/inverter.  It was running great.  So great that I couldn't believe it.  After 4 hours, the voltage from those two batteries was holding at 22.75.  I hooked up my kill-o-watt and discovered I was only pulling around 100W, sometimes less -- it was using about as much as a bright light bulb.  I had been taken.  It was just pretending to run.  In the process, it caused me to run the fan against my batteries for 4 hours, reducing their fully charged status.

So ultimately, I had to bring it up and set it next to my radiator.   First, I ran it on the utility power.  This time, the  kill-o-watt showed 600-650W, on occasion kicking up to 750W.  Not bad.  I then brought up my battery setup and ran it off of that.  Similar wattage.  However, this time I only was able to run it for 20 minutes.  I suspect that it would have ran longer had I not drained the batteries all day.

So I am going to charge these batteries and try this again.  However, in the meantime I decided to do some theory.  My batteries are 175Ah.   Connecting them in series only increases the voltage -- the  two should be considered one 24V battery.   Amp-Hour is a rating of how long a battery can supply 10Amps in an hour.  To me, this means I should take my wattage, calculate the Amperage, and divide the Ah rating into it.  According to my inverter manual, I should take my wattage, divide it by 10, and divide the Ah rating by that number. At 750 or 650 watts, the manual's method comes to 2.3 or 2.9 hours, respectively.

The amperage draw varies from 5.7 to 6.9. I have read various documents on Ah rating, and I am more confused than when I started. From various sources, I am supposed to divide my Ah rating by the Amperage draw of the device.  The thing about that method is though, I would be looking at 175/7 for 25 hours.  In this case, I expect the manual's calculations (approx 2.5 hours) to be more accurate.  I also checked other batteries out on the web.  US Battery sells a 130Ah battery and calculated that it will run a 25A load for 205 minutes (3.4 hours).   Since my load is approximately 1/4th of that, I should get 820 minutes (13 hours).   I don't believe that I will get anywhere near that amount of runtime.

I also believe that Ah requirement ratings are explained deep in a textbook that takes you  several weeks of studying.  This knowledge has not made it properly to the web, but has been "summarized" by a lot of people that don't understand the subject matter.  To make it worse, battery manufacturers spin these details to make their batteries look better.

Here is what I know.  My device draws 600-750W (or 6-7A) during normal operation.  It needs to run for approximately 5 hours/day over the course of 3 days (15 hours).  In theory, that is 90-105 Amp-Hours, so I don't see why a theoretical 175Ah battery won't provide that charge.

In reality, this power should have been provided using my 12V inverter.  We are dealing with wattages much, much lower than 1000, and my 12V inverter was a 1500W inverter (with 3000W peak).  Now, I believe a single 12V battery is going to have trouble exceeding 2000W, but I am not hitting above 800W.

In this case, there are a couple possibilities.  1) My Cobra 1500W inverter is junk.  2) The #6 AWG wires going to the inverter are a larger impediment than suspected, or 3) My Kill-O-Watt meter is junk.

In any event,  I can run this air conditioner off of 2 12V batteries and 1 inverter.    This summer, I am going to implement the following:


  • Install the two batteries ($90ea) in the van in their current setup with the 24V inverter ($190) to run the air conditioner.  Depending on further tests this week, I may add more.
  • Solar Panel 185W, 24V solar panel (approx $600)
  • Charge controller, 24V (unknown price: $80 - $150)
  • Estimated cost: $1,060.
I know that the 2 batteries will power the air conditioner.  I don't know for how long.  I suspect it could be from 2-4 hours.  I will be conducting additional tests (hopefully this week) to figure out how true this is.  All the calculations in the world won't show me what a real life test can do.

Most posts agree that you need about 30% of your operating load to recharge a battery bank in any decent time.  My solar panel is on the lower side of that 30% (30% of 600W = 180W,  30% of 750W = 220W).  However, I will be operating the air conditioner considerably less than 50% of the daylight time.  Also, I hope that once the air conditioner cools down the area of the van, it will drop to fan and be in the 100W range (at which point, the solar panel will power it completely).    I also plan to make use of a fan and install a vent in the roof to let heat escape.

If more power is needed, additional batteries, or even a second solar panel could be added to the system.  I would much  rather start small and improve on it than to go overboard on this system.

Friday, February 19, 2010

Winter update

I thought I'd update everyone with the progress of this experiment.  We are now at the 6-month mark.  I started this on 8/17/2009 and today is 2/19/2010.

Winter has made some things tougher and some things easier. I no longer have to run the generator and air conditioner to keep the van cool.  On the other hand, for the last couple months, the inside of the van has been around 15F-19F in the mornings.

When I start the day, I kick on the space heater for a while.  This gives me a sense of warmth as it heats up the area closest to me.  However, when it's that cold, a 3,000 BTU heater is going to take a long time to get it from below freezing to above freezing.  When it is 40F out, it can actually heat the van from 40F to almost 60F in a 20 minute time span.

Over the last couple weeks, I have taken to starting the van itself up and letting it run while I wait inside work.  I don't completely trust letting the propane heater run by itself without supervision.  Utilizing the gas engine is more expensive, but considerably safer (in my opinion).  The van's heater can warm up the interior well above freezing in under 30 minutes.

In reality though, heating in the morning is almost unnecessary.  If I buckle down and force myself, I can be changed and inside my sleeping bag within a couple minutes.  Within 5-10 minutes, the inside of the sleeping bag become suitably warm.  It can be 19F in the van and 60F inside the sleeping bag around my feet.

As the day progresses, the sun comes out and warms the van considerably.  As peak sun, the van can reach 60F on a sub-freezing day.  If i wake up prior to 3PM, I can enjoy this warm climate.  However, after 4PM, the sun wanes and the van temperature starts dropping down into the 40s.  At this point, the heater is necessary to maintain.

What I should do is go to the gym immediately after work, instead of after sleeping.  However, I find that dealing with putting together a gym bag and other rigmarole in the cold morning to be a nuisance.  Perhaps I'll be able to adjust my patterns before winter ends.  However, in the summer the opposite should occur.  In the summer, going to the gym in the afternoon avoids the heat and ensures that any sweat gained during the hot day is washed off.

Dealing with the cold is easier and cheaper than dealing with heat.  My own body generates lots of heat, which can easily be trapped around me.

Finally, a financial update.  I have updated my equipment page with full details.  For just a quick rundown, I have spend $2,856 on equipment to date.  My operating cost to date has been $890.62.  Looking at just operating costs, I spend $148.43/moth.  A good portion of that operating cost was in fuel between August and December (the cost of traveling).   If you factor out the cost of travel, operating costs drop to $275.70 or $48.45/month.

If you factor in the sunk cost of equipment, the total monthly cost breakdown is $624.44.   Omitting travel costs, my monthly breakdown is $524.45.

A few things are going to happen in the next few months that will add to my costs.  One is that I need to get some exhaust work done.  I have an exhaust leak that is rather loud.  The other thing is that work may request that I take the van with me on my weekends once the weather warms up.  This of course will lead to increased travel and maintenance costs.  I also need to invest in a suitable roof vent.

The final part remains to be seen.  I have ordered a 24V (1500W/3000W peak) power inverter and will be attempting to run my air conditioner off of it using a pair of 12V car batteries in series.  If that can run the air conditioner (which I now believe to be 950W-1010W operating/2020W peak/start-up), then I will attempt to determine the run time and size of battery bank needed to run the air conditioner.  The inverter is close to $200, deep-cycle batteries run close to $100 each, and the cables aren't cheap either.  I would initially charge these using either the generator or power from utility lines.  If all the other ifs work out, I would then look at investing in solar panels on the van roof to charge and maintain the battery bank.

I have not yet factored the cost of the inverter or batteries into my equipment as I may end up not being able to use that type of inverter (some motors require a pure sine wave to operate).  I've also been seeing some 800W, 7000BTU air conditioners on the market (mine is a 9000BTU) for around $300.  These were not readily available when I first started searching out air conditioners.  However, if things work as planned, I could see adding another $1000-$1300 to my equipment costs.

Thursday, February 18, 2010

Photos of my setup


UPDATE: Photos are also available on flickr.com/campatwork

Bowing down to popular demand, I am posting photos of my camping setup below:
 
The Vehicle itself. 


 Toilet, Bed, Sink, and Desk


Direct view of desk